Evaluating your negatives
Keep in mind that although a
negative can easily record a brightness range of 200:1, a print is only
capable of about a 50:1 brightness range. This means that you cannot
print everything onto the paper that you can see on your negative.
Learning how to evaluate what kind of negative you have got is a core skill in
making good prints. Keeping a "printing notebook" is very helpful as
a learning tool for new photographers .
 A well exposed negative that is correctly processed has well separated
tones and visible detail in the important highlight areas and in the shadow
areas. A white shirt, or the bright area on a forehead are examples of highlights
that should have visible detail and appear dense but still transparent and full
of detail. On the other hand, an image of a light bulb or a bright reflection
of the sun which are specular (extrmely bright) highlights we would expect to
be pure (paper) white on the print.
Shadow detail in a good negative is visible
in all areas of the negative except deep shadow . In a portrait we would expect
to see separation between the very dark tones visible in dark hair or the fabric
pattern in a dark blue suit. A negative such as this has been given normal
exposure and normal negative development .
 This type of negative makes a "full scale print." that shows tonal gradation
everywhere except in the deepest shadows representing pure black or specular
highlight areas (paper white.) Negatives like this are printable with a number
2 to 3 contrast filter.
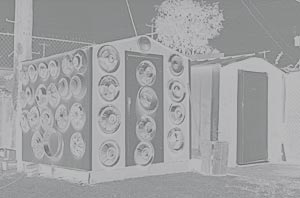
A well exposed negative that has been
underdeveloped will result in a flat lifeless print. These negatives have
lots of detail in the shadows and in the highlights but the negative appears
"flat" and has a lifeless and grey appearance overall caused by the poor
separation of the tones describing the scene. These negatives look grey and
lack vigour...Negatives of this type
are low in contrast and require the use of high contrast filters when enlarging
on multigrade paper. A # 4 might rescue this example. The cost for
this is harsh gradation and more obvious grain on the print. These
negatives will break your heart and are usually not worth the work it takes
to get a mediocre print.
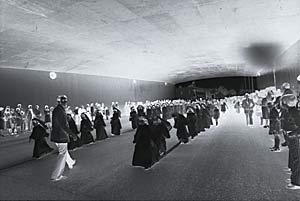 A well exposed negative that is overdeveloped appears to have "sooty"
and dense highlights that are blocked and difficult to print. If you look
at the edge numbers on the rebate of the film it will appear contrasty . Overdeveloped
negatives make grainy prints that are burned out in the highlights with unusually
vigorous shadow detail. Prints from these negatives look a bit like a xerox
print .... with few grays.
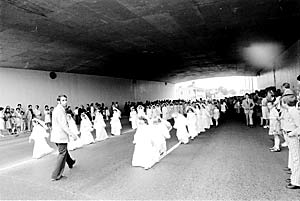 This print shows the effects of overdevelopment, the girls are in diffuse shaded
light and yet there is extreme contrast in the shadows which would normally
be leaden and grey. The dresses of the girls are blown out and almost
unprintable.
The finished image is harsh - even when
printed with a low contrast filter to compensate for the high negative contrast
. (A #1 filter or lower would be appropriate). The overdevelopment
could have been caused by too high a negative developer temperature, too vigorous
agitation, too long in the developer , too high a developer concentration or
too much time in the development,
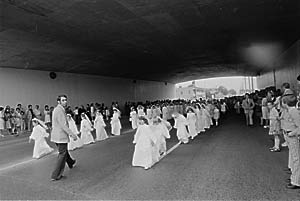 The last print of the girls in the underpass is the result of using low paper
contrast (to overcome the high negative contrast) when enlarging. This will
not do anything to reduce the graininess of the print and it will not
allow you to rescue tonal gradation in the highlights if the negative is so
badly overdeveloped that there is no contrast left in the highlights to exploit.
(if all the highlight detail is on the shoulder of the film curve you are out
of luck.... your highlights will simply print a featureless grey)
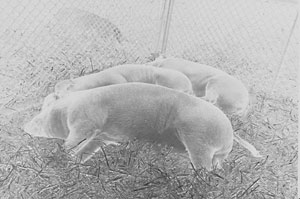

A negative that is underexposed and normally developed has little or
no detail in the shadow areas that are important to the subject. It is described
as "thin". The highlight areas will be rich , transparent and full of
detail but they will render as depressed muddy greys instead of bright highlights.
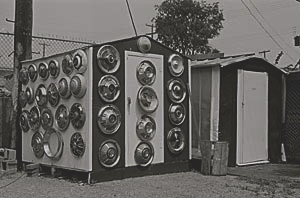
This type of negative is similar to the flat negative of the hubcaps we saw
earlier.
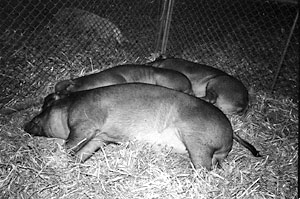 Unless compensation is made at the printing stage the print will be flat and
lifeless. A photograph of a gray scale made from an underexposed negative results
in a picture that has no shadow detail where there was some in the original
subject. There is no cure for this once the film has been processed. The light
sensitivity of a film is built in and cannot be changed. However, it is possible
to compensate and get a more acceptable but not excellent print
bi increasing the paper contrast so that the highlights are more vigorous.
Printing underexposed negatives is a soul
destroying task . No matter what you do to the print it will be far more difficult
to make than with a good negative and you will always get mediocre results from
the rescue.
A print from a negative that is both underexposed and underdeveloped
has too little exposure to record the shadow areas and has thin
highlight density too . Although an image may be visible it cannot be
printed satisfactorily at all. Barring exotic rescue strategies these
negs are usually a dead loss .
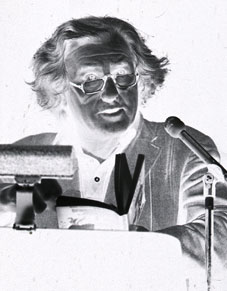
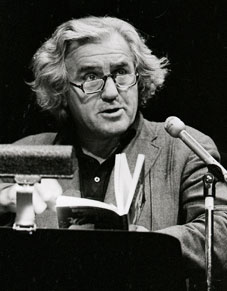 Push processing - a useful abuse of the material!
Here is a negative that was underexposed
and intentionally overdeveloped it has little or no detail in the shadow
areas of the subject. but it still has enough density in the highlights so that
we can make a print with normal contrast and tones in the upper part of the
grey scale.
Doing this intentionally is called push
processing film. When I took this picture I only had 400 film in my bag
which was not sensitive enough for me to take a picture in the available light
at any shutter speed faster than 1/8 of a second - much too slow to guarantee
a sharp image. I shot this image with my meter set to 3200 iso - underexposing
the film by three full stops. Ordinary processing of the film would give me
a negative with no shadow detail and unprintably dark highlights. I overdeveloped
my film by about 50-60% more than the reccommended amount to make the highlights
dense enough to get a good print. The film still had no shadow detail and it
was very grainy, but I was able to make an image of the areas important
in the scene to me and use a high enough shutter speed to get a sharp picture.
This technique is used a lot in surveillance photography, sports photos and
low light circumstances where high shutter speeds are needed. There are better
ways - use p3200 film which is inherently more sensitive to light, for example.
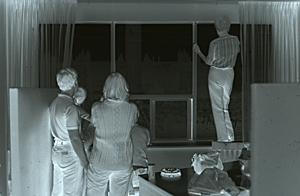
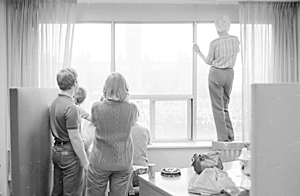
An overexposed negative that is normally developed will appear dense.
There will be too much shadow detail and the highlights will all be compressed
into areas of the film that print nearly pure white. Burning (adding more light
to the affected area) and dodging (preventing too much light from the affected
area at the printing stage) can rescue negatives like this if the overexposure
is not too severe. These negs are always more grainy than a properly exposed
negative. This negative was printed with a #1 1/2 filter and a lot of local
printing in (burning in.)

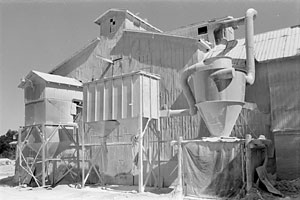
A "pulling film" ie: slight over exposure of a contrasty scene and intentional
underdevelopment to keep the highlights transparent while giving enough exposure
to ensure lots of shadow detail. These low contrast negatives of high contrast
subjects can be very useful for but the negatives will be unprintable if the
original scene is low in contrast. Set your meter to a lower ISO than the film
is rated for (1-1/12 stops less iso) and underdevelop it by 15-30% of normal.
This must be determined by tests to be reliable..This technique is not used
often with 35mm black and white photography, it is a core technique for photographers
who are shooting sheet film in very contrasty circumstances who wish to capture
a wide range of tones.
An overexposed negative that is overdeveloped
appears extremely dense and sooty and is laughing referred to as "bulletproof".
The grain will be very excessive for the film used and the highlights will be
unprintable. There is almost no way to make full scale prints from such a
negative.
more examples
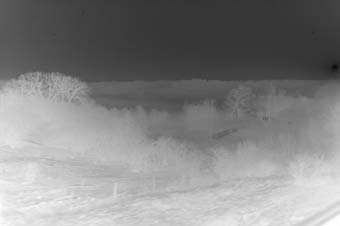
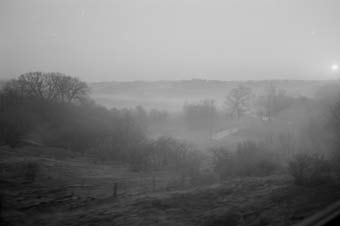

A flat negative of a flat scene normally
exposed and processed. The second image is a normal print on made with a
normal contrast filter and the image is dull and lifeless. It requires post
exposure work at the printing stage.
The final print was made with a higher contrast
filter and a lot of handwork to create image contrast where there was none.
The print must be finely tuned to the negative contrast in order to give a result
which is convincing. In the third image the foregound was " burned in " and
the edgs were burned in order to darken them slightly. The highlights were dodged
slightly to give some sparkle to the print.
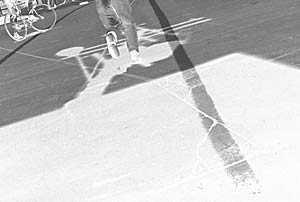
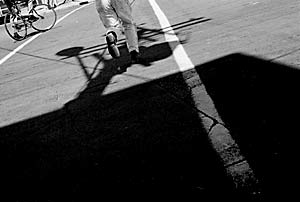
A thin negative printed with high contrast. This image does at the printing
stage what might also have been done by pushing the film. The negative contrast
is low and the image is underexposed, a pictorially useful (but technically
incorrect - who cares?) print was achieved by upping the paper contrast with
the use of filters. There is very little increase in the apparent grain even
though a high printing filter # was used because the negative was not overdeveloped
(not much silver halide converted to metallic silver particles because it was
underexposed) and the negative itself does not have the exaggerated grain that
comes from overdevelopment.
 A well exposed negative that is correctly processed has well separated
tones and visible detail in the important highlight areas and in the shadow
areas. A white shirt, or the bright area on a forehead are examples of highlights
that should have visible detail and appear dense but still transparent and full
of detail. On the other hand, an image of a light bulb or a bright reflection
of the sun which are specular (extrmely bright) highlights we would expect to
be pure (paper) white on the print.
 This type of negative makes a "full scale print." that shows tonal gradation
everywhere except in the deepest shadows representing pure black or specular
highlight areas (paper white.) Negatives like this are printable with a number
2 to 3 contrast filter.

 A well exposed negative that is overdeveloped appears to have "sooty"
and dense highlights that are blocked and difficult to print. If you look
at the edge numbers on the rebate of the film it will appear contrasty . Overdeveloped
negatives make grainy prints that are burned out in the highlights with unusually
vigorous shadow detail. Prints from these negatives look a bit like a xerox
print .... with few grays.
 This print shows the effects of overdevelopment, the girls are in diffuse shaded
light and yet there is extreme contrast in the shadows which would normally
be leaden and grey. The dresses of the girls are blown out and almost
unprintable.
  The last print of the girls in the underpass is the result of using low paper
contrast (to overcome the high negative contrast) when enlarging. This will
not do anything to reduce the graininess of the print and it will not
allow you to rescue tonal gradation in the highlights if the negative is so
badly overdeveloped that there is no contrast left in the highlights to exploit.
(if all the highlight detail is on the shoulder of the film curve you are out
of luck.... your highlights will simply print a featureless grey)

 Unless compensation is made at the printing stage the print will be flat and
lifeless. A photograph of a gray scale made from an underexposed negative results
in a picture that has no shadow detail where there was some in the original
subject. There is no cure for this once the film has been processed. The light
sensitivity of a film is built in and cannot be changed. However, it is possible
to compensate and get a more acceptable but not excellent print
bi increasing the paper contrast so that the highlights are more vigorous.
 Push processing - a useful abuse of the material!


